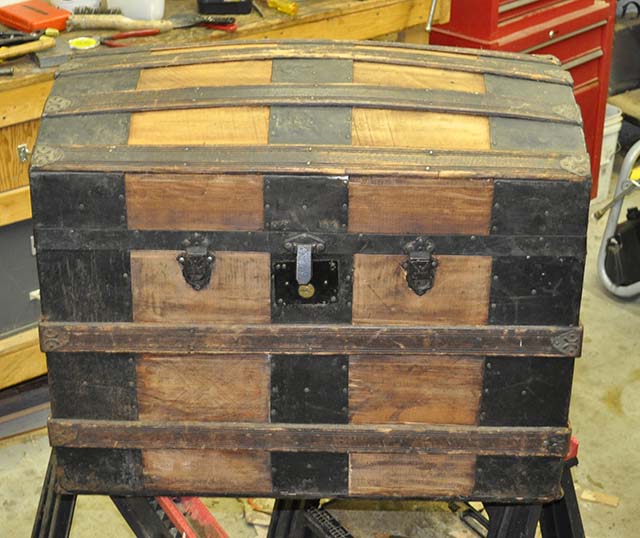
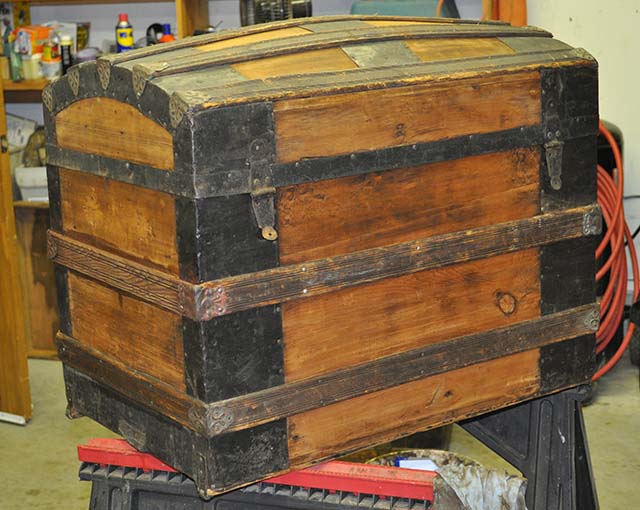
I have cleaned the outside and removed all evidence of the leather covering.
These trunks have different types of coverings. Some include canvas, leather, and metal. I am sure that you may have seen them all and maybe some that I have not mentioned. Again, the value of a trunk will be higher in the original condition. So if you find one that the outside covering is in decent shape, think long and hard before destroying it. You may just regret it later!
I am sure that there is more than one way to remove the outer covering, but again I use warm soapy water in a spray bottle. I also keep a bucket of warm soapy water next to me with a rag in it. Now for this trunk the leather was VERY dry and was falling off. So most of it was removed without water. But there was the glue residue left behind. For that I used the warm soapy water and a putty knife. Try not to dig into the wood!
Normally you would wet a section really good and let it soak for a few minutes. While you are waiting take a razor knife and cut very carefully along the edges. I try to angle the knife to get under any surfaces that you are cutting around. You will not want to see any ragged edges left behind.
Also during each step, I am looking for sharp edges, loose parts, and splinters. We want the finished product to look old, but to be smooth and safe to the touch!

This glue and covering came off fairly easy. I have had some that were so tough I actually used paint remover on them to clean them up.

The further along you get, the more exciting it gets. You can start to get a better idea of what the finished product will look like.
I also used an air compressor to blow this off after the wetting and scraping process was complete. I like to blow the water out of the nooks and crannies. I don’t want any rust or warping problems later.
In the next step I will start the sanding process.

This looks really cool. I have a trunk that has been in my parents basement for a while that I’d like to try to fix up. Structurally, I don’t think it was in as bad of shape as yours was, but it still needs some serious work. Couple of questions for you, if you don’t mind. What kind of skill level are you? Do you do a lot of work work/restoration? I don’t have any experience, but would like to think I could do a half decent job. I’m just afraid that I’m going to undertake this project and it’s going to end up being something that only a highly experienced person could accomplish. How did you do the sanding? Was it by hand? What kind of grit, etc did you use? Thanks!
Mike,
I am not really skilled at all. I bought a trunk and refinished it. Period. Did a little research before I started, but had really never done it before. You will find a lot of resources for research. But if you follow the steps that I showed you should not have any problems.
I would start with a very fine grade of sandpaper and only increase it if you feel the need . The main thing is that everything be smooth to the touch. And the finish will smooth it out even more.
If you can look at a problem and solve it, you can refinish your trunk. Just thinking that if you run into any problems you may have to look it over and come up with an action plan.
I started on trunk number 9 for me and still ran into some problems that I have not encountered. But I analyzed them and came up with some solutions that I can live with and that I think will work. Are they 100% correct? Probably not. But will anyone look at the trunk with a magnifying glass? Probably not. If it looks good to YOU at the end of the project, you will have been successful. It will still be a trunk that will be passed down through your family.
But the most important thing is for you to be satisfied and to be proud to display it in your home, and not in your basement. LOL
Bob